Tuesday, March 29, 2011

A card and... a paper clip idea!

Hello everyone. Here is a card I made with butterfly stencil. I traced the butterfly on foam and felt sheet and I cut it out with scissors. I used glitter glue around edges of butterfly:) and added chenille stem for middle of butterfly body and antenna.The solid paper used is Recollections and pattern paper is from the Yearbook paper pad. Felt, foam sheets, chenille stem , paperclips, puff ribbon and stencils was purchased at Dollar Tree store. Sparkle glitter glue is from Micheal's. Click any photo to enlarge it!

I used my hot glue gun and adhered a 50mm paperclip to back of butterflies. These can be used to clip to cards and as book page markers:) These can be made in butterflies, hearts, flowers etc. This is a great idea and it decorates your paper clips:) These are awesome! I hope, I inspired you to make some decorated paper clip. These are fun to make!


This card is for these challenges
Paper Playtime Challenge #42 anything goes.
Alphabet Challenge U for up in the air.
Scrapbookaholic By Abby challenge to create something Spring.

Thank you for stopping by and have a fabulous Day:)

Monday, March 28, 2011

Basket of flowers!

Hello friends! I hope you week is starting off good and you are well. Here is a recycled project. The box I used for this project was a box filled with chocolate candy. This was a Christmas present from my friend. I keep the box after all the chocolate was gone and I adhered some pretty pattern paper to it:). This box was too nice to trash it. Don't you think so too? I used Mod Podge Gloss -Lustre to adhered paper to box and I painted the Mod Podge all over the pattern paper to give the paper a glossy shine:) I used gems, gold crafts wire, brass finished fasteners and puffy paint to embellish flowers and basket. I used pop dots to give the flowers and basket some dimension.


The pattern paper is from the Yearbook Paper pad. This paper is so pretty! The solid paper is Recollections card stock. I used Doodlecharms flower on page#91 and the basket is on page #116. flowers cut @ 2 inch and basket @ 2 7/8 inch. I used Design Studio so I could cut them to fit the box.


Here is the box before I decorated it and the top is after:) I love the outcome of this project! I just love it:)
This project is for these challenges:
Fantabulous Cricut Challenge #53 to use a Spring time theme.
Paper Playtime Challenge #42 anything goes.
Jitterbuggin Challenge to add a Cricut flower to project.
Frosted Designs challenge to reuse or repurpose things you already have around the house!

Have a fabulous week all and thanks for stopping by :)

Sunday, March 27, 2011

Rose stamped ... gate fold card!

Hello out there! Happy Sunday to you all. I hope you are well and having a wonderful day. The card is A2 size. I embossed the card with Cuttlebug folder (Distressed Stripes). Thank you stamp is a Inkadinkado #17 clear stamp and paper is Recollections card stock. I stamped the roses on white cardstock with black ink and I cut it out with scissors and used Ek Success (Pastel Colors) Memory pencils to color roses and I added Raspberry Sparkle Glitter Glue to roses to give them some sparkle :)


This rose stamp I bought at Dollar Tree Store for $1.00! I used the corner rounder on the pink and blue card stock to round the corners. I won this green corner rounder from a blog friend. Mollie is so generous and always having a giveaway:) Here is Mollie's blog if you want to check it out. Cricket's Cricut Creations


Have a great day everyone and thank you all for stopping by :)

Wednesday, March 23, 2011

Butterfly card!!

Hello everyone! I hope you are well and having a great day. Here is a card I made with my Seweasy stitch piercer tool. I won this from Cathie @ Creative Cutter Room. Cathie has a card challenge every other week. She has an amazing and awesome blog! This card is A2 size. I used a butterfly stencil and traced the butterfly on pink cardstock :) I colored the butterfly with Ek Success pastel colors memory pencils and I used Sparkly Glitter Glue to add some bling to the butterfly and some puffy paint. I adhered some buttons on embossed flowers. I cut around butterfly with my zig zag scissors. Click photo to enlarge!


I embossed the card with Cuttlebug (Stylized Flowers) embossing folder. I added some soft tone Inkadinkado blending chalk to embossed card. This gave the embossed card some color :)

Here is the photo of the Sew Easy stitch piercer tool. I did not know they had a tool like this. I'm so glad I won it :) Thanks again to my friend Cathie. I love this Seweasy tool :)

This card is for these challenges:
Cuttlebug Spot Challenge to use buttons.
Paper cutz Challenge #83

Have a great day and thank you for stopping by :)

Friday, March 18, 2011

Party favor purse!

Hello everyone! Happy Friday to you all. I know you all happy that the weekend is here. Here is a cute party favor purse. I'm making 20 of them for a friend of mine for her daughter party. This purse is so cute and it is on Forever Young Cartridge. This purse is on page #70 of the handbook. I used the fit to page button on Cricut Expression to cut the purse the size of 8 1/2 by 11 in card stock.


To make the flower. I used the Knifty Knitter flower loom:) I used pink gift wrapping raffia to make flower. Here is a video tutorial on how a flower is made on loom:)
Have a great weekend everyone and thanks for stopping by:)

Tuesday, March 15, 2011

Crocheted bowl :)

Hello friends! Happy Monday! I hope you all are having a great day! Here is what I been working on. A crocheted bowl filled with mints. I love to crochet! It is a very relaxing craft to do:) This crochet bowl is 2 in height by 5 in diameter. This is a super cute bowl to crochet. This is a easy crochet project to do and a beginner can make one:) If they know how to read a pattern. I can make one of these bowl in 25 minutes. I can crochet very fast:) I been crocheting for many years :)


Here is the link. If you want to try to make one. Leave a comment. Let me know what you think:)


Have a great day and thank you for stopping by:)

Thursday, March 10, 2011

Earring giveaway #3

Hello everyone. I hope you all are having a great Thursday. It's rainy and pouring down rain here. There is flood warning in effect for today. Here is my handmade twisted wire earrings to giveaway for March. One person will win both pairs of earrings:) Leave a comment and you will be enter to win both pairs. You must be a follower to win. This earring giveaway ends on April 5, 2011. I will random chose winner.


Which pair of earrings do you like the most?

Have a great week and thanks for stopping by:)

Monday, March 7, 2011

Earring Winner and a dress card!

Hello my friends. Here is a quick A2 size card I made today. This card was inspired by my bloggy friend E.T! E.T makes alot of amazing and gorgeous cards! Go check out her blog! This card was designed on the Gypsy. If you want to know the height on Gypsy it is 1.00. This dress is on the Sweethearts cartridge and is on page #58 of handbook. I have no idea who I will give this card to. I just wanted to make this card. I did not stamp a sentiment on it. I guess I will do that later on.


I added some green tulles and ribbon to the dress. I embossed the blue card stock with cuttle bug (Swiss Dots) embossing folder.


The winner of the handmade earrings is #11 City mouse. Congratulations City mouse. Email me your snail mail and I will send you the earrings ASAP. My email is on my side bar. Thanks to everyone who left a comment for a chance to win. I will be posting another handmade earring giveaway this week ;)

Have a great week all and thanks you all for stopping by:)

Sunday, March 6, 2011

My first i -rock Tool project!

Happy Sunday friends. I hope you all are enjoying your day. Here is more earrings I made out of ribbon. These earrings are made different then the ribbon rose earrings. I tried to make these earrings look more like a flowers not like the rose earrings here.


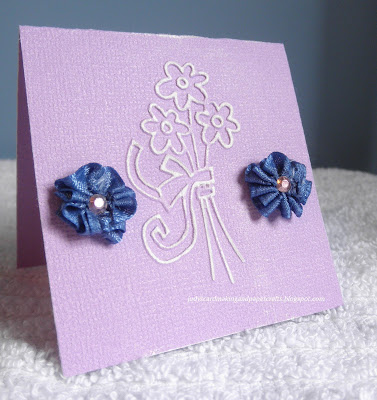
I used the i -rock tool by imaginisce to adhere the (bling) Glam rocks in center of flowers. This is my first time using this tool and I love it ;) I embossed the card with Cuttlebug (Best Friends) embossing folder. This set has (4) small embossing folder with it. To give the embossed bunch of flowers that white look I sanded it with a finger nail file:) I seen that idea on a blog but I can't remember where :(

Have a great week all and thank you for stopping by:)

Thursday, March 3, 2011

Shape card and more ribbon rose earrings!!

Hello friends and welcome to all my new followers. I hope you are well and having a great Thursday. Here is a shape card I created and welded with my Gypsy. The pot of gold and clover is on Paper Doll Dress up Cartridge and is on page #40 of handbook.


Here is the inside of card. This card and earrings I'm giving to my MOM :)


I been creating a lot of these earrings. Everyone wants a pair of them ;) This is my original idea, turning the ribbon rose in to earrings:) What do you think about that? Here is what I think!! I love them because I can make these earrings in any color ribbon to match any outfit. Here is a close up of rose ;)


This project is for these challenges

Creative Cutter Room Challenge to create a project with green, pot of gold, clover and button.

Cooking with Cricut challenge to create a project with 2 solid cardstock, 2 pattern paper and 2 embellishments.
Have a great week everyone and thank YOU for stopping by :)

Tuesday, March 1, 2011

Birthday Bash shape card!!

Hello Friends. I hope you all are having a great day. Here is two cards I made for my daughter girl friends for their Birthday this month. This Bunny shape card and Hoppy Birthday is on the Birthday Bash cartridge and is on page # 27 of handbook. I love this cartridge. My son gave this cartridge to me for my Birthday last month :)


The pattern paper is Miss Elizabeth's paper from Dollar Tree store. I bought it about 7 months ago. I don't think they sell it there any more. I haven't seen it lately. I'm so glad I bought the paper when I seen it. The bunny at the top looks like a quilt. I love that pattern paper! I embellished the bunny with pom poms, google eyes and ribbon ;)


I cut the Hoppy Birthday for the inside and I pen stitched with StarLightz Glitter Gel Pen. This card was very easy to make. This card is cute, cute, and cute :)


This card is for this challenge
Fantabulous Cricut Challenge to create a shape card.
Have wonderful week my friends and thank you for stopping by :)
Related Posts Plugin for WordPress, Blogger...